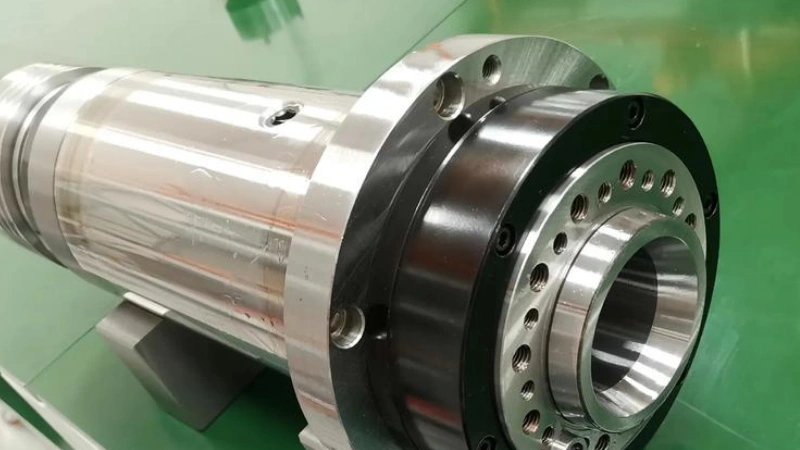
In modern milling machines, the spindle, called the C-axis, is located vertically, has a power of

up to 15 kW with an adjustable rotation speed of up to 24,000 min-1. It is mounted on high-precision bearing supports. The spindle of a CNC machine is made precise, rigid, with increased wear resistance of the necks, seating and basing surfaces. The spindle design is significantly complicated by the built-in devices for automatic installation and clamping of the tool.
The accuracy of spindle rotation is ensured, first of all, by the high precision of the bearings. Rolling bearings are used in spindle supports. To reduce the effect of gaps and increase the rigidity of the supports, bearings with a preload are usually installed or the number of rolling elements is increased. Any aggregate head with a cutting tool can also be installed on the spindle, fastening is carried out using a docking unit and a hydraulic clamping system. The spindle body can rotate around the horizontal axis by an angle in the range of 0 … 360° using a cylindrical gear with a controlled drive. This makes it possible to turn the aggregate head by any given angle. Its rotation is performed automatically with high accuracy according to the control program.
The main drive in CNC machines is usually an AC electric motor. A frequency converter is used to control the rotation frequency of the asynchronous motor shaft. The converter is an electronic device built on the basis of microprocessor technology. Control of the rotation frequency of the cutting tool is achieved automatically after entering the electric motor parameters into the control program.
The problem of a loose spindle on a CNC machining center can significantly affect the quality of the parts being processed, the durability of the cutting tool itself, and the amount of unexpected costs for reworking the product. The spindle is one of the most important elements responsible for transmitting precise rotation to the tool, and any instability leads to increased vibration of the machining center, which in turn reduces the cutting accuracy and accelerates the wear of the machine parts.
As a result, we get increased noise, decreased machining accuracy, and vibration during operation. Often, the main reasons for a loose spindle are:
1) insufficient tension of the fastening elements;
2) wear of the bearings;
3) lack of spindle balancing or its curvature.
To avoid such problems, it is important to regularly, with the help of certified personnel, carry out maintenance of the CNC center and follow the recommendations for operating the equipment issued by the machine manufacturer.
Currently, monitoring systems already allow real-time tracking of spindle parameters (runout, temperature, vibration), which, in principle, prevents problems before they arise by almost 90%.

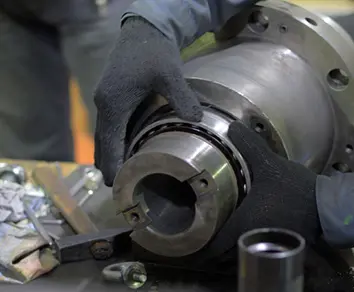
The spindle is an expensive and difficult part to manufacture, so it should be changed only in exceptional cases, especially in large machines. In spindles, necks, end holes, places for ball and roller bearings, threads and keyways wear out more often.
The choice of method for restoring the main surfaces of the spindle is made depending on the extent of their wear.
Spindle necks. The wear of the necks largely depends on their quality. If the necks are raw, then the wear can be very significant and large burrs around the circumference are possible. If the spindle design allows, the neck must be turned, polished and polished with GOI paste or presses with fine emery cloth, abundantly wetting the neck with oil. If there are no grinding machines, then the necks should be cleaned with a wide spring cutter on a lathe, removing very fine chips, and then polished to a mirror shine.
If it is impossible to reduce the diameter of the neck, it is possible to drill it and put on it a sleeve made of the appropriate steel with a hot fit. If this is not possible, then the spindle must be replaced with a new one.
With hardened or nitrided necks, there are no deep gouges. There are usually scratches and even or uneven wear. In these cases, the necks need to be ground and polished to a mirror shine, but before polishing, it is necessary to check whether the hard layer has not been removed completely or in parts. It is possible to check the breakdown with a small file. If the neck is soft, it should be chrome-plated with a thin layer (up to 0.01-0.03 mm of chrome). If the spindle steel can be hardened, the necks can be hardened with high-frequency currents. If it is impossible to increase the hardness of the necks, the question of replacing the spindle must be solved depending on the working conditions of the machine.
The taper of the spindle for the center or the tool, due to the carelessness of the workers, is often clogged and loses its correct shape. This is also caused by turning the shank of the tool or the mandrel. You can check the correctness of the cone by caliber. To do this, it is necessary to first clean the cone from burrs and polish it with an emery cloth, and then wipe it well, apply three or four chalk lines on the gauge along the lines forming the cone, insert the gauge into the spindle cone and carefully turn it several times. The correctness of the shape of the spindle cone can be judged by the way the chalk lines on the caliber will be erased.
If the cone needs to be ground, it is best to do it on the machine itself with a portable grinding device or, as a last resort, with a manual scraper according to the caliber. If it is necessary to bore the cone, then it is better to bore under the adapter sleeve, in which the inner cone should be made standard so that it is suitable for normal centers and mandrels.
In general, it can be concluded that the correct diagnosis of the spindle and proper technical maintenance of the equipment will significantly extend the life of the CNC machining center.


